

On this page you will find:
- The anatomy of the violin and the bow
- The range of the instrument
- What kind of double notes are possible
- What kind of chords you can write for a violin
- The maximum velocity we can achieve and why.
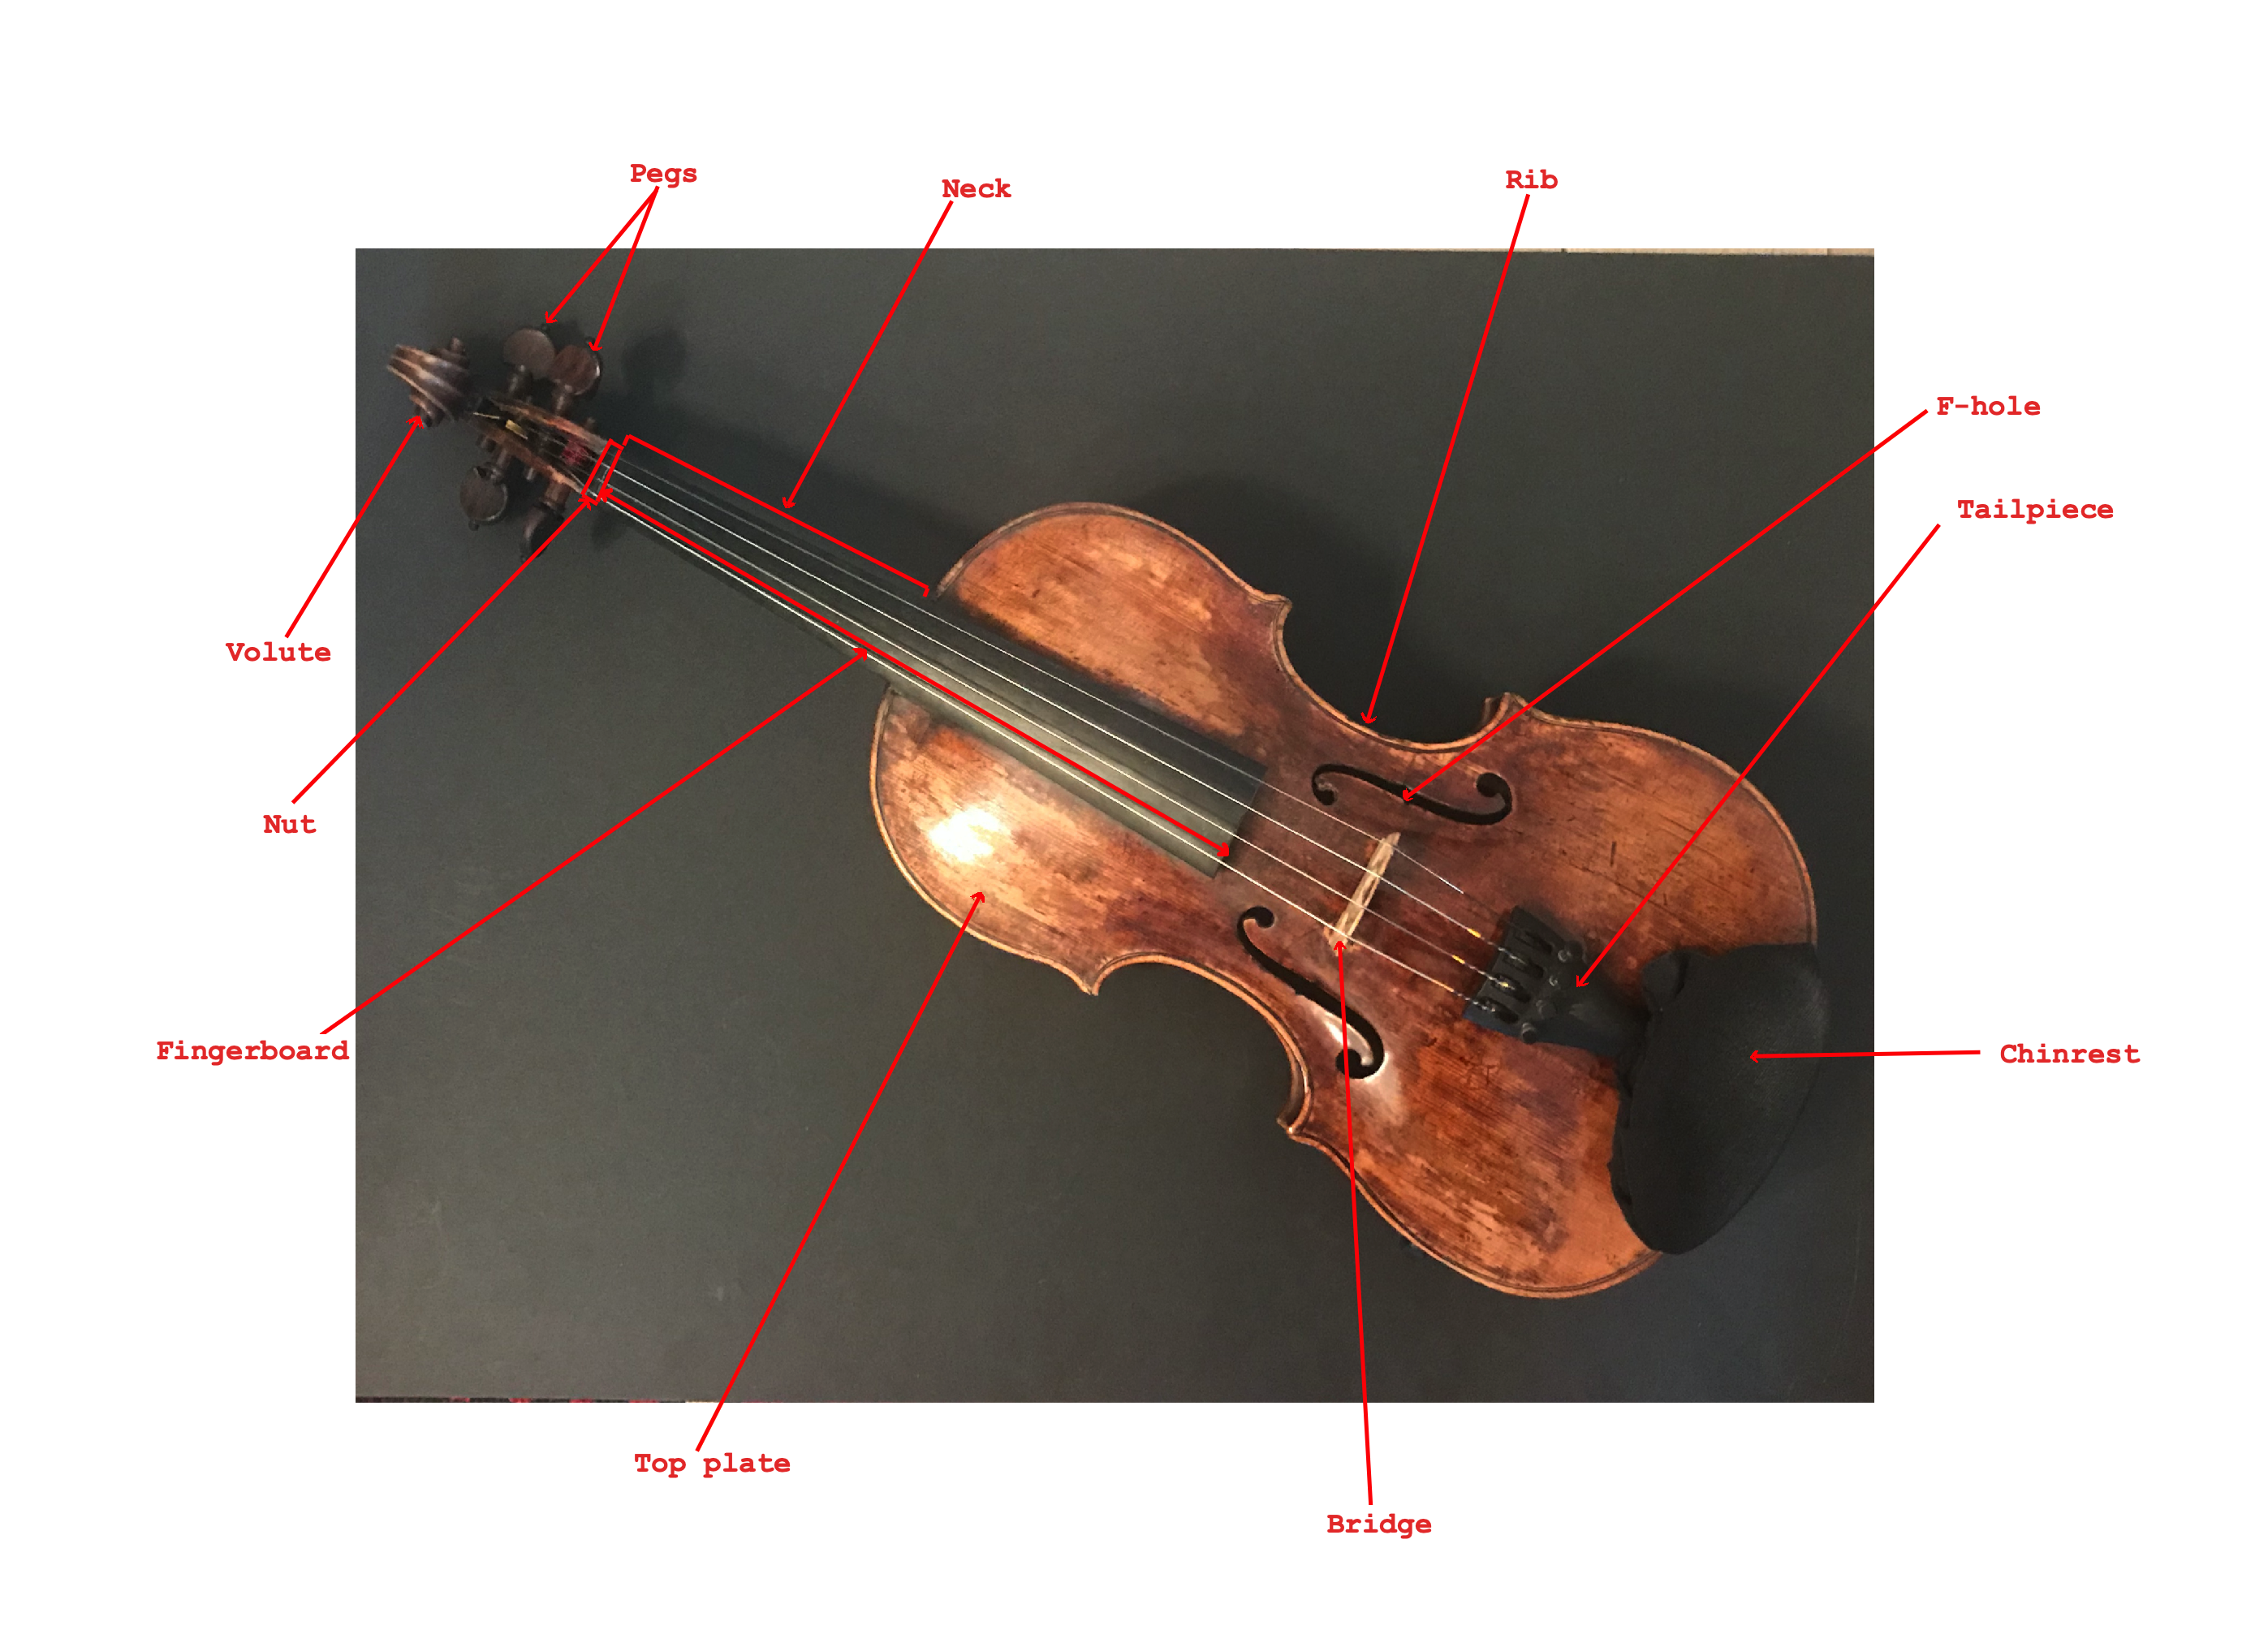
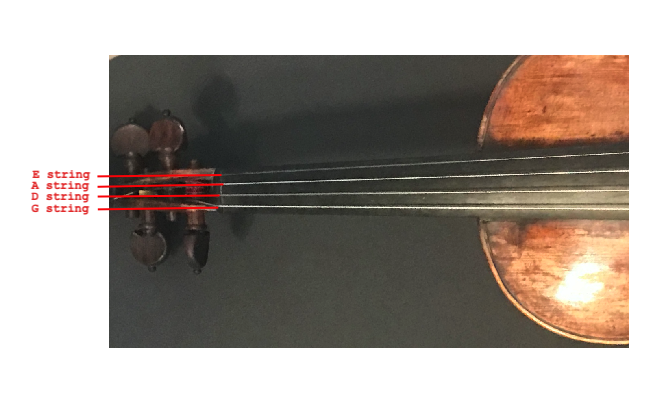
THE VIOLIN’S ANATOMY
I thought it might not be completely useless to go over some basics with you. After all, the violin may be a completely foreign instrument to some of you, and I realized in my discussions with composers that some things that seemed quite obvious to me were not necessarily to them.
So let’s start with a little bit of “geography”, with the different parts of the violin:
Let’s also take a look at the bow:
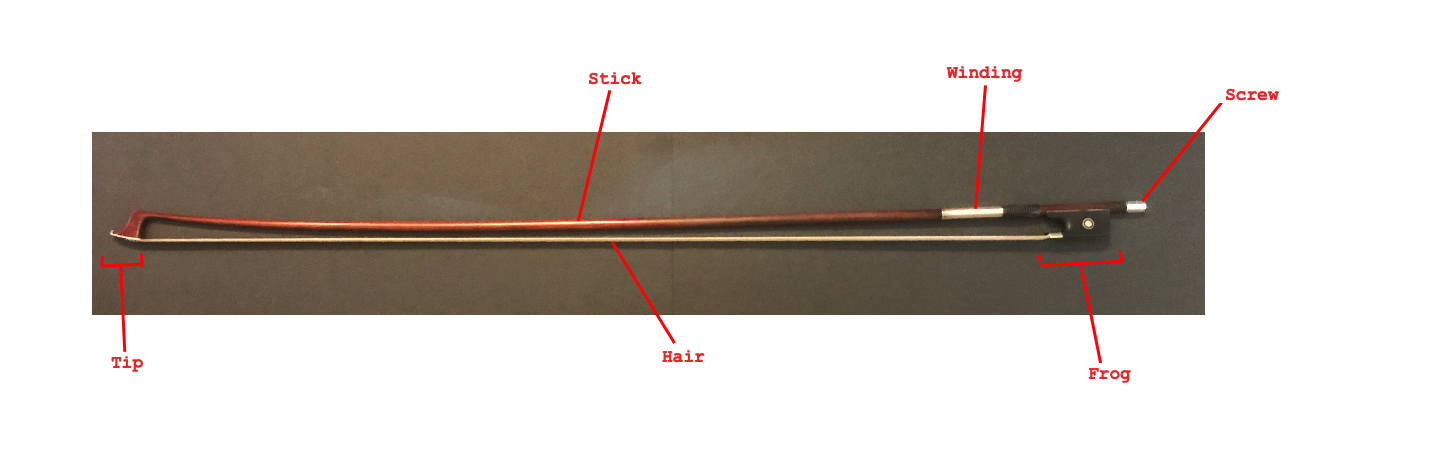
A few basic terms (a general overview, I’ll come back to it in greater detail later):
- To play down bow is to draw the bow from the frog to the tip;
- To play up bow is to draw the bow the tip to the frog;
- Détaché is playing one note per bow stroke (whatever the length), keeping the hair on the string;
- Spiccato is similar except for removing the hair from the string between each note, with a very short note rendering.
- Legato is to play several notes in the same bow stroke.
You are now all caught up. Of course, I have not written down all the parts of the violin and the bow, because this is not a violin making course (I would be incapable of doing so!), but with this you have everything you need to understand the basic techniques and to venture into more recent techniques: white noise, saturations… (We will talk about it later, I promise!).
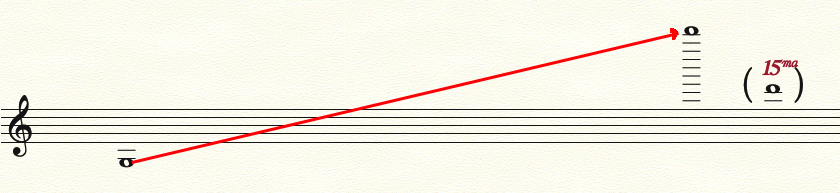
THE VIOLIN RANGE
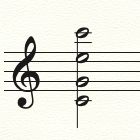
The complete range, from the open G to the last note at the very end of the fingerboard on the E string:
Now let’s take a closer look at the range of the G string. I have indicated the positions, meaning the groups of notes that can be played without shifting, i.e. without moving the left hand along the neck of the instrument. Each position on a string covers about a fourth: don’t forget that, on the violin, since the thumb is positioned on the other side of the neck to ensure the stability of the hand, only 4 fingers are used on the left hand! Schubert would always forget that… Therefore, unlike for the piano, the index finger is called the first finger, the middle finger the second, the ring finger the third and the little finger the fourth. It may not seem very useful to you to know this, but it will be necessary to understand which notes you can associate in a chord.Therefore, unlike the piano, the index finger is called the first finger, the middle finger the second, the ring finger the third and the little finger the fourth. It may not seem very useful to you to know this, but it will be necessary in order to understand which notes you can associate in a chord.
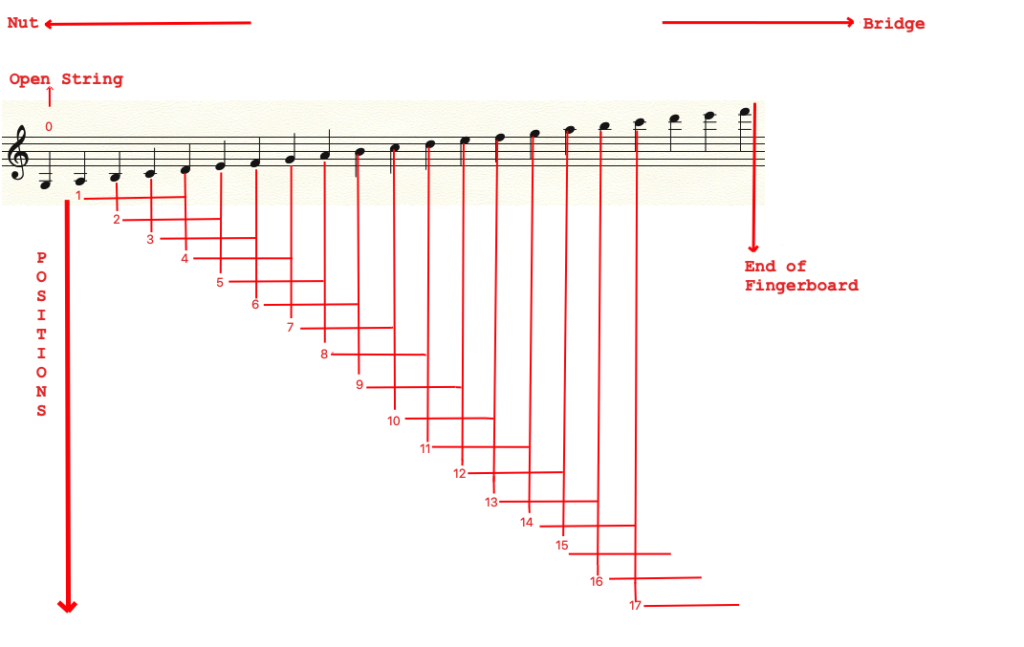
We find the same thing, of course, on the other three strings, each time at a higher fifth.
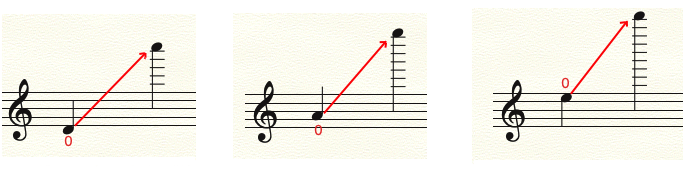
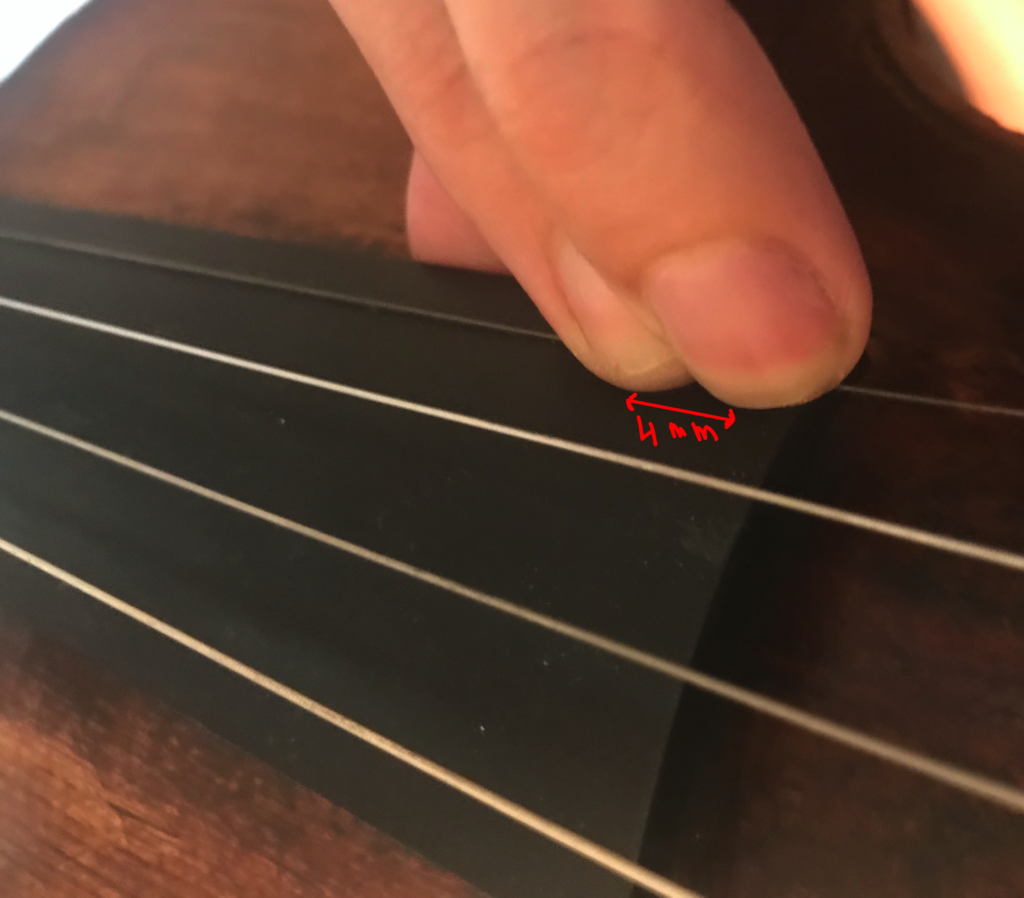
As you may know — especially if you have read my article on micro-intervals — the higher you move up the string, the shorter the distance between tones becomes. In other words, no two tones on the same string measure the same distance. In the first position, a tone measures 32mm, whereas at the very end of the fingerboard, 4mm.

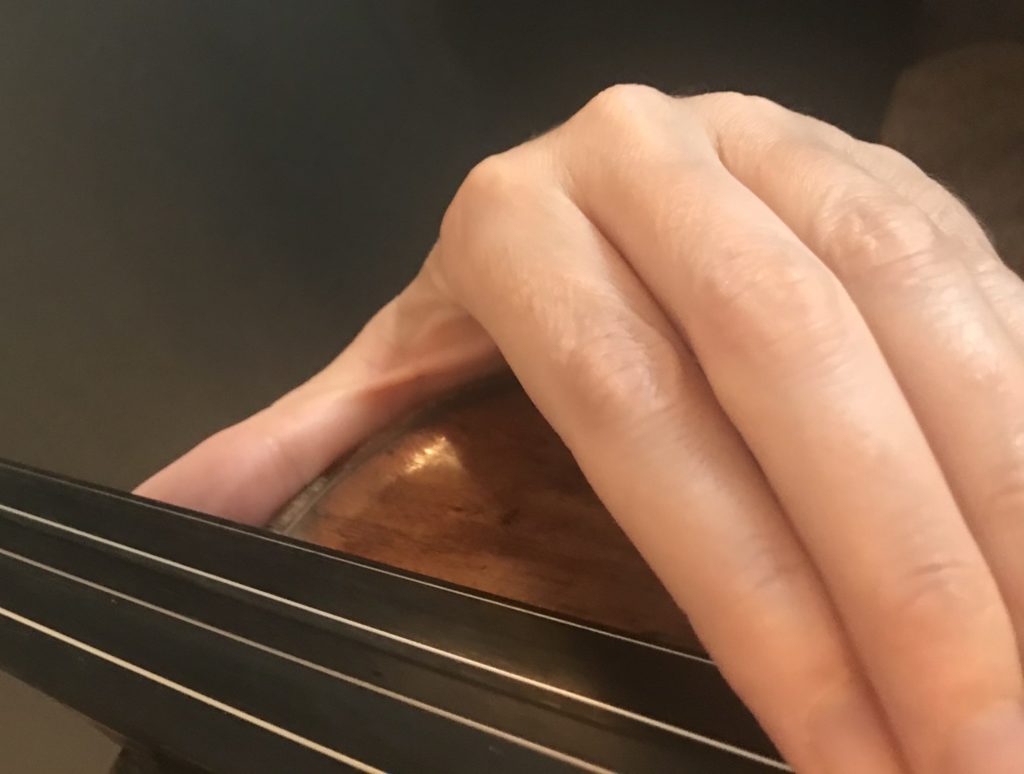
At the end of the neck, in 5th position, the thumb is placed against the the neck heel (the “thumb stop”) and remains in the same place until the 10th position or more: this varies according to the string and the size of the violinist’s hand (and more specifically the distance between the tip of his thumb and the tip of his index finger).
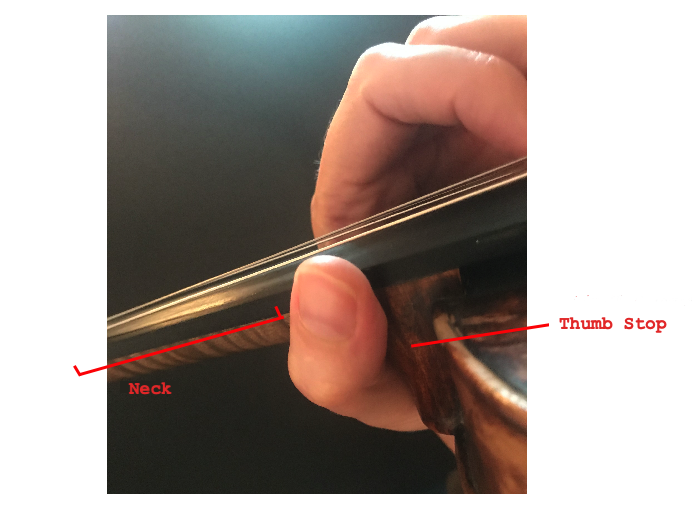
At the end of the possible distance between the thumb and index finger, the thumb slides along the body of the violin and, for the very last notes, is placed against the fingerboard.
In addition, the string is held between the nut, which is 1mm high, and the bridge — placed on the top plate — which is about 25mm high. The distance between the string and the fingerboard therefore varies from less than 1mm in the first position, to 7mm at the end of the fingerboard (these measurements vary from one violin to another and from one string to another, because the bridge is neither flat nor symmetrical!). This may not seem like much, but it takes much more force to press the finger on the string at the top of the strings than at the bottom.
For these three reasons:
- smaller tone distance
- less stable thumb position
- greater height between the string and the fingerboard
one will NEVER be as precise nor as fast at the end of the fingerboard as elsewhere.
On top of that, the length of the string actually played (the distance between the finger on the fingerboard and the bridge) has an influence on the quality of the sound you will obtain: the shorter the length (the higher your finger is on the fingerboard), the more the sound will be “strangled”, especially when playing in louder dynamics.

(But I’m not saying that it can’t be interesting as a sound result!).
You may have noticed that, so far, I’ve only been talking about the notes on the fingerboard, and you probably wonder, o ye intrepid composers, what happens beyond that???
Well, yes, it is possible to play beyond the fingerboard.
But as you can imagine, the difficulties encountered at the end of the fingerboard are of course always present beyond that. The tones get smaller and smaller (remember that, at the very end of the fingerboard, the distance of a tone is already about 4mm and that my — rather thin — index finger has a depth of 8mm), not to mention that the string length becomes tiny (the sound gets choked). It becomes difficult to play loud, because normal bow pressure at this point creates saturation: the result is often a mixture of note pitch and scratching.
And then on the E string, we reach such a high range, that it becomes very difficult to hear precise pitches (unless you have the hearing of a dog!!!).
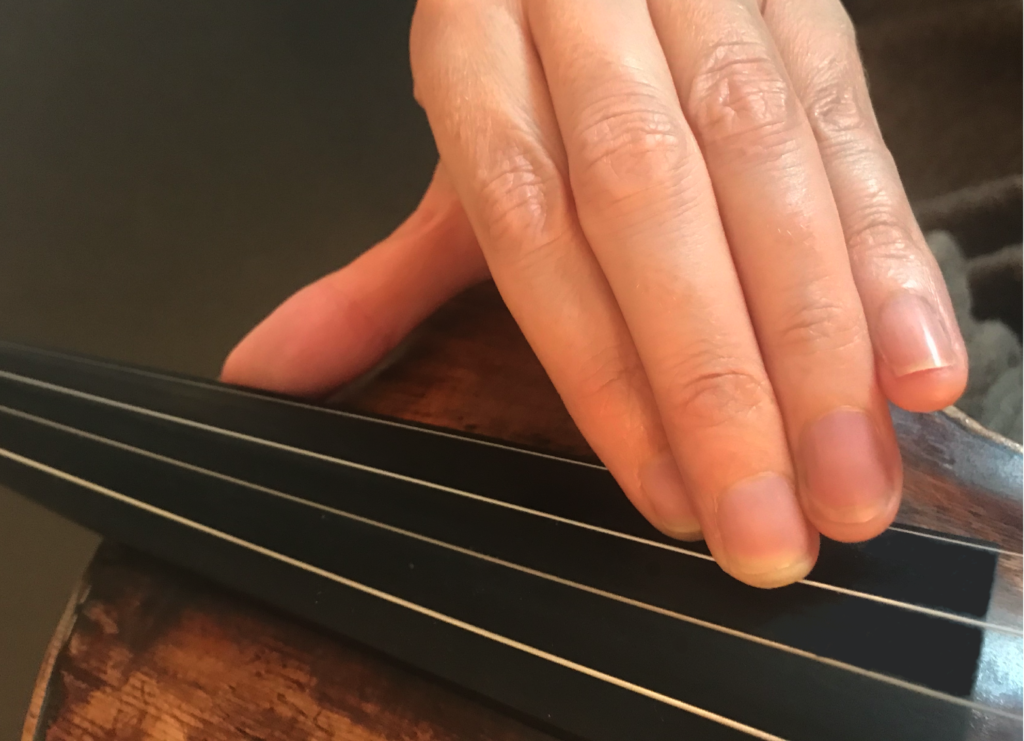
For these reasons, most of the time this part of the string — between the end of the fingerboard and the bridge — is rather used for natural harmonics, or “undetermined/as high as possible” sounds, notated with an arrow (a triangle) pointing up.
When using this notation, be very careful to put the note very high above the staff, because when it is displayed like this:
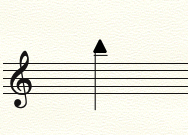
I don’t know about you, but I tend to want to play a B.
I’d prefer this:
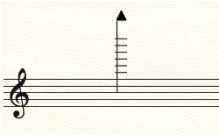
or even that:

No doubt while reading: precise performer: happy composer.
In addition, this part of the string is covered with rosin (this is where we draw the bow, which is covered with it!) and consequently our fingers in turn end up covered with it.
And rosin sticks.
A lot.
As a result, when you get back to a lower position, your fingers stick and the shifts (the passage from one position to another) become extremely problematic.
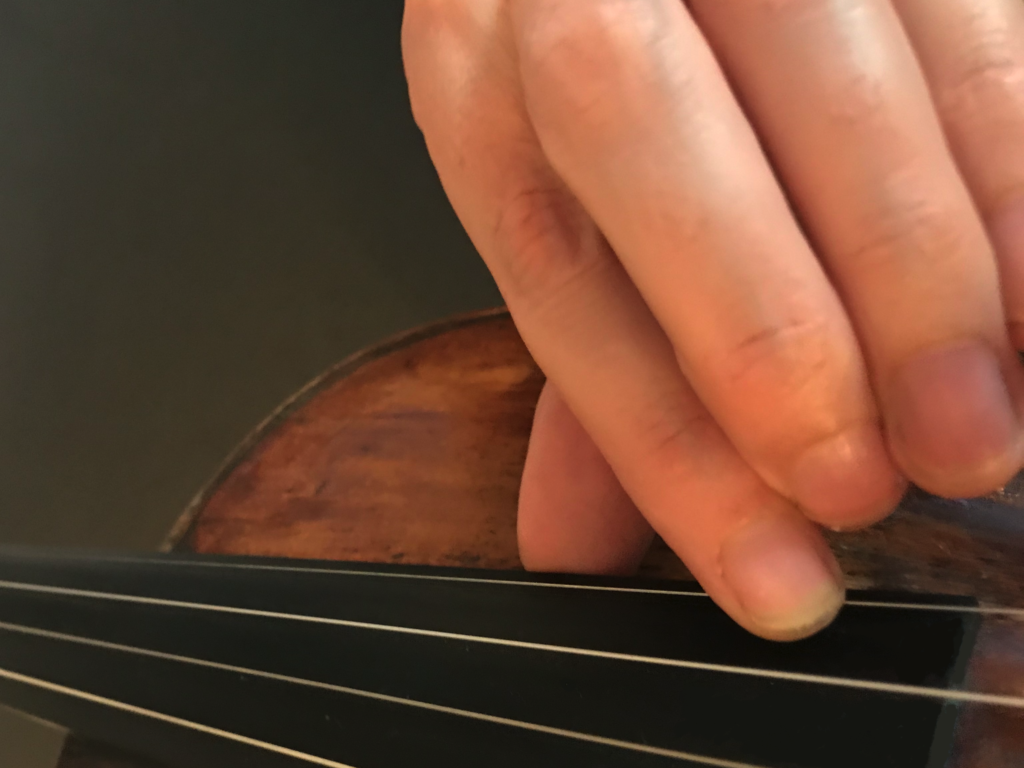
Do not go overboard using it, and remember to introduce a little silence to allow your performer to wipe his or her hand (with a small black towel that he or she will have taken care of placing nearby!). Also, be aware that it is possible to obtain a rather similar sound result by drawing the bow behind the bridge (between the bridge and the tailpiece): The size of the string is more or less the same as between the end of the fingerboard and the bridge, plus one avoids the inconvenience of rosin on the fingers, which can be useful in case of an isolated “undetermined/highest possible” note.
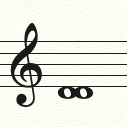
DOUBLE STRINGS
Almost all the intervals can be played at the same time on the violin, from the unison to the tenth. They are called double strings.
However, due to the fact that the open strings are tuned a fifth apart, not all of them can be played in the lower part of the range.
Allow me to explain:
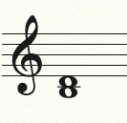
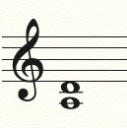
The first achievable unison is D/D. From G to C![]() the notes are only available on the G string, so there is no way to play them both together!
the notes are only available on the G string, so there is no way to play them both together!
The first possible second:
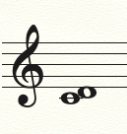
Third:
Fourth:
Then, starting with the fifth, everything is possible from the low G:

We can imagine intervals wider than a tenth at the top of the range, because, as I said in the beginning of this article, the closer we get to the end of the fingerboard, the shorter the distance between tones! Finally, if one of the two notes is played with one of the open strings, the interval spectrum is no longer limited by the flexibility of the hand and you can consider adding the whole range of the adjacent strings.
The following intervals are therefore feasible, either because one of the notes is an open string:

or because we are at the top of the range of the A and E strings:

One last note on this subject, you should also know that the first unisons and tenths in first position without empty strings are very large, and that not all hands are able to perform them.
Let’s just say that it requires a hell of a stretching session!
So be careful with those!

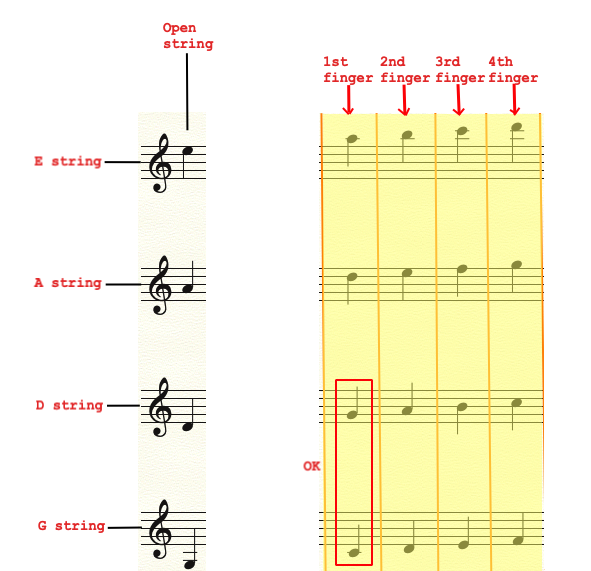
3 AND 4 NOTES CHORDS
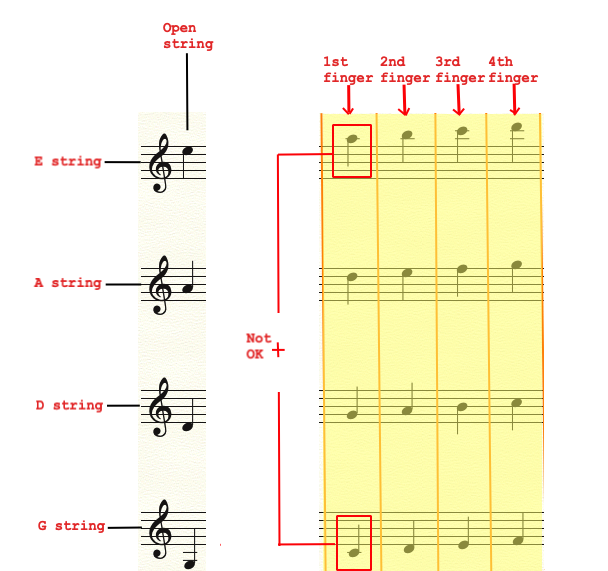
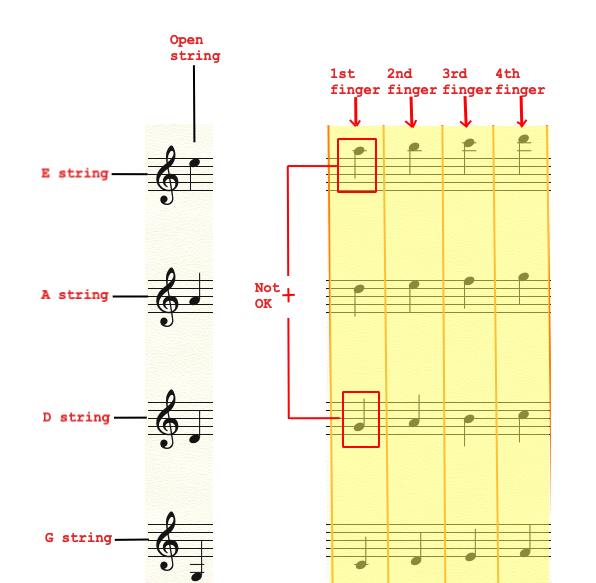
It is difficult to explain exactly which notes you can associate in a chord, as there are so many scenarios! Nevertheless, I tried to imagine a graph to help you and give you a basis for your work.
Each note of each string is written, and the positions are indicated above, from the first to the 17th, a bit like looking over the fingerboard of a violin with the scroll (volute) on your left.
Here’s what it looks like, you can click on it to enlarge.

Assume that you can choose all the notes available in a given position — one per string — with the possibility to stretch the first finger about one extra tone downwards and the fourth finger about one extra tone higher.
For example, let’s isolate the third position:

You can use C/D/E/F on the G string, G/A/B/C on the D string, D/E/F/G on the A string and A/B/C/D on the E string, maybe even stretching to a B on the G string (2nd position) or an E on the E string (4th position).
We have a common fingering for each of the columns:

So you can choose one note per fingering and per string.
You can write a fifth (and since the two notes are opposite each other, they will be played with the same finger) on two neighboring strings:
However, the same is almost impossible on two distant strings. Unfortunately, our fingers don’t have the gift of ubiquity: they can’t be in two places at the same time!
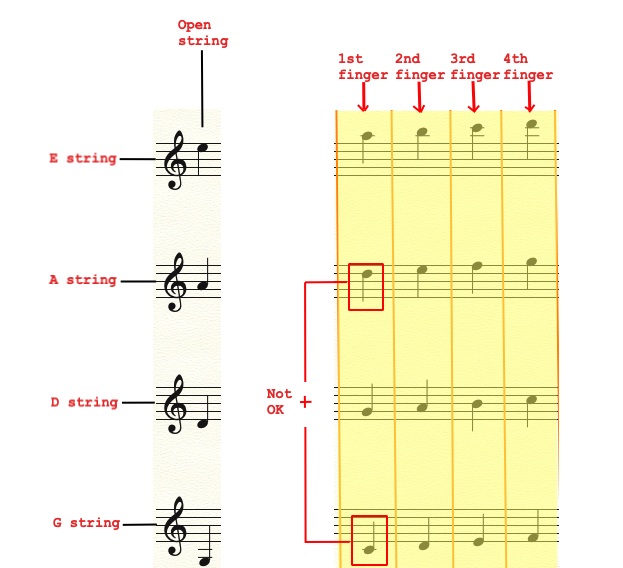
For the same reason, it is almost impossible to play a chord of consecutive fifths on the violin (with the exception of the empty strings), since the angle between the hand and the violin’s neck does not allow us to place our finger flat, perpendicularly to the string, as a guitarist or a cellist could do.
Keep in mind that, like with double strings, the use of empty strings is possible in any position, and that you can allow yourself to stretch to a note or two beyond the position with the first or fourth finger.
Of course, this graphic is very restrictive, and I’m schematizing so much that it’s almost ridiculous: in practice, you still have more flexibility! When in doubt, discuss it with a violinist, on a case-by-case basis. But this little chart should allow you to start with a “feasible” basis.
Addendum:
Philippe Manoury (if you don’t know this wonderful composer yet, click HERE) was kind enough to inform me of a very clever tool for composing “playable” chords. These are laminated strips of paper indicating all the fingerings of the string quartet’s instruments. Sold rolled in a box, you just need to glue them on rigid cardboards. You will then be able to see “in real life” the feasibility of your chords (but be careful to use it correctly — to position the cardboard at the right angle with your hand!).
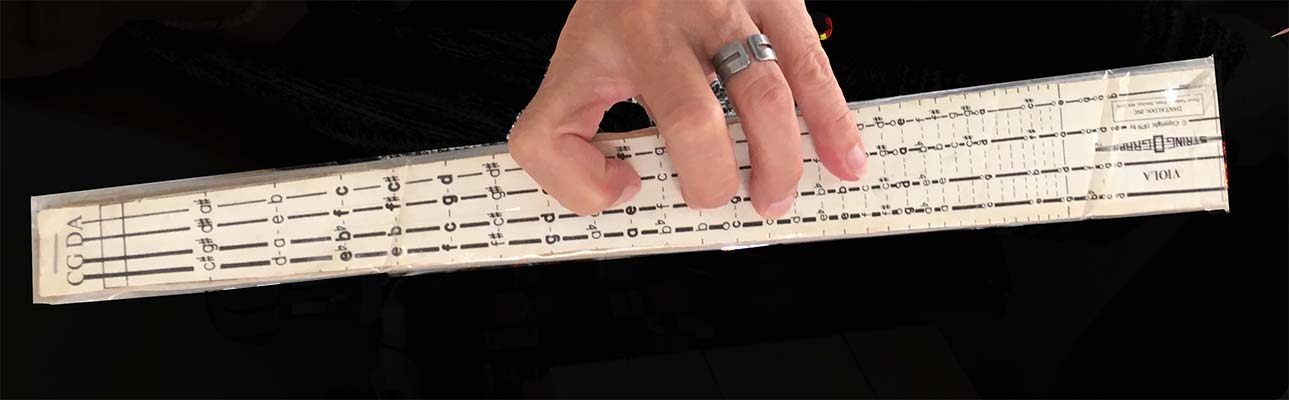
This tool, called “stringograph”, is on sale on the inventor’s website dantalian.com for about $5.
Due to the curve of the bridge,
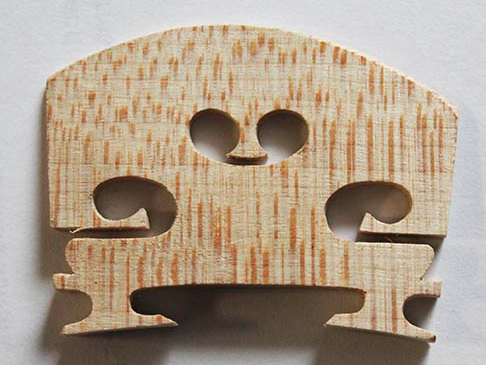
the natural sound production of a violin chord is slightly arpeggiated. However, it IS possible to play all the notes simultaneously (especially with three-notes chords, it is more complicated when they are four) by moving the bow slightly towards the fingerboard — in other words by playing tasto — because this curve fades away as one approaches the nut. At the very bottom of the fingerboard, in the first position, the strings are “flat” — at the same height. But the sound of the chord will consequently be less brilliant and the dynamic in the middle range at best! For the same reason, playing a long chord, it will be impossible to keep all the notes for the complete duration of the value.
This chord:
will sound:

(You can of course “tighten” the rhythm!)
Same thing for the tremolo: we will only play it on the last two notes of the chord, at best:

It is IMPOSSIBLE to play simultaneously all the notes of a chord ponticello. Now, I know I said in another article that I never say “never”. But here, the pressure and force necessary to flatten the strings near the bridge would be enough to break it: I set the limit at the destruction of my equipment!
By default, a violinist will play a chord from bottom to top. It is also possible to play it the other way around, if it the bass notes that you wish to hear last. In that case, it is customary to indicate this by a descending arrow to the left of the chord.

Finally, in a melodic context, it is possible to keep one of the intermediate notes of the chord tied with a back and forth movement: the whole chord from bottom to top and then from top to bottom until the desired intermediate note is reached.

Since the beginning of the 20th century, one can find — for example in Bartok and Ysaÿe — chords of more than 4 sounds. The idea is, in fact, to “cheat” by adding an appoggiatura of one or more notes.

The result is quite close to what you would get if you were to add two more strings to a violin and played a six-tone chord!
VELOCITY
Another question I am often asked: “How fast can one play?”
Well, I won’t surprise you, it depends.
First of all, on the violinist. I’m not going to elaborate on that, not all instrumentalists have the same technical abilities, and in any event, we all have our strong and weak points!
But let’s say that you are talking to a good professional violinist: not Paganini, but much more advanced than your little nephew!
Well, again, it depends. But this time on you.
Let me explain:
The maximum velocity will depend on:
- The type of bow stroke: détaché or legato?
We’ll always be faster legato than détaché.
- The “proximity” of the notes: consecutive, distant, very distant notes?
The more distant the notes are, the less it will be possible to play fast. Shifting between the third and the tenth position requires a little time.
- The frequency of string changes;
In the same manner, changing strings takes time (I’m talking milliseconds here, right? Not taking a coffee break!), even more if the two strings are not adjacent.
- The length of your sequence.
Yes, when you play very fast, you get tired very quickly.
So let’s say on “average” (although I don’t like that too much):
For a détaché sequence, with fairly joint notes, not too frequent string changes and not too long, you can imagine a maximum tempo of around 150 the quarter note, imagining that your line is in sixteenth notes: thus a velocity “per note” of 600 (150×4).
For the same line but legato, I’d say 180 the quarter note would be a good limit: 720 per note.
(For your information, the famous piece “Flight of the Bumblebee” revolves around 680 the note, it’s long and détaché but the notes are adjacent and the string changes are rare).
Bearing all this in mind, it’s up to you to adapt your tempo according to whether you add or remove difficulties! But above all, trust your performer. The notion of speed is very relative: the “perceived” speed can be different from the real speed, depending on a whole range of circumstances — acoustics, previous speed, skill of the interpreter etc. (A bit like the weather, you know? You have the temperature and the apparent temperature, which takes into account the wind, the humidity… Well, it’s the same here!). You must not forget that, like everything else, speed is also an emotional element. So stop looking at your metronome, don’t expect your work to sound exactly like the playback of your notation software (it’s a computer) and let yourself sense the speed!
Do not hesitate to contact me for questions or remarks, propose a subject for a new article, I will try to answer it as best I can!
And subscribe here if you wish to be informed about new articles